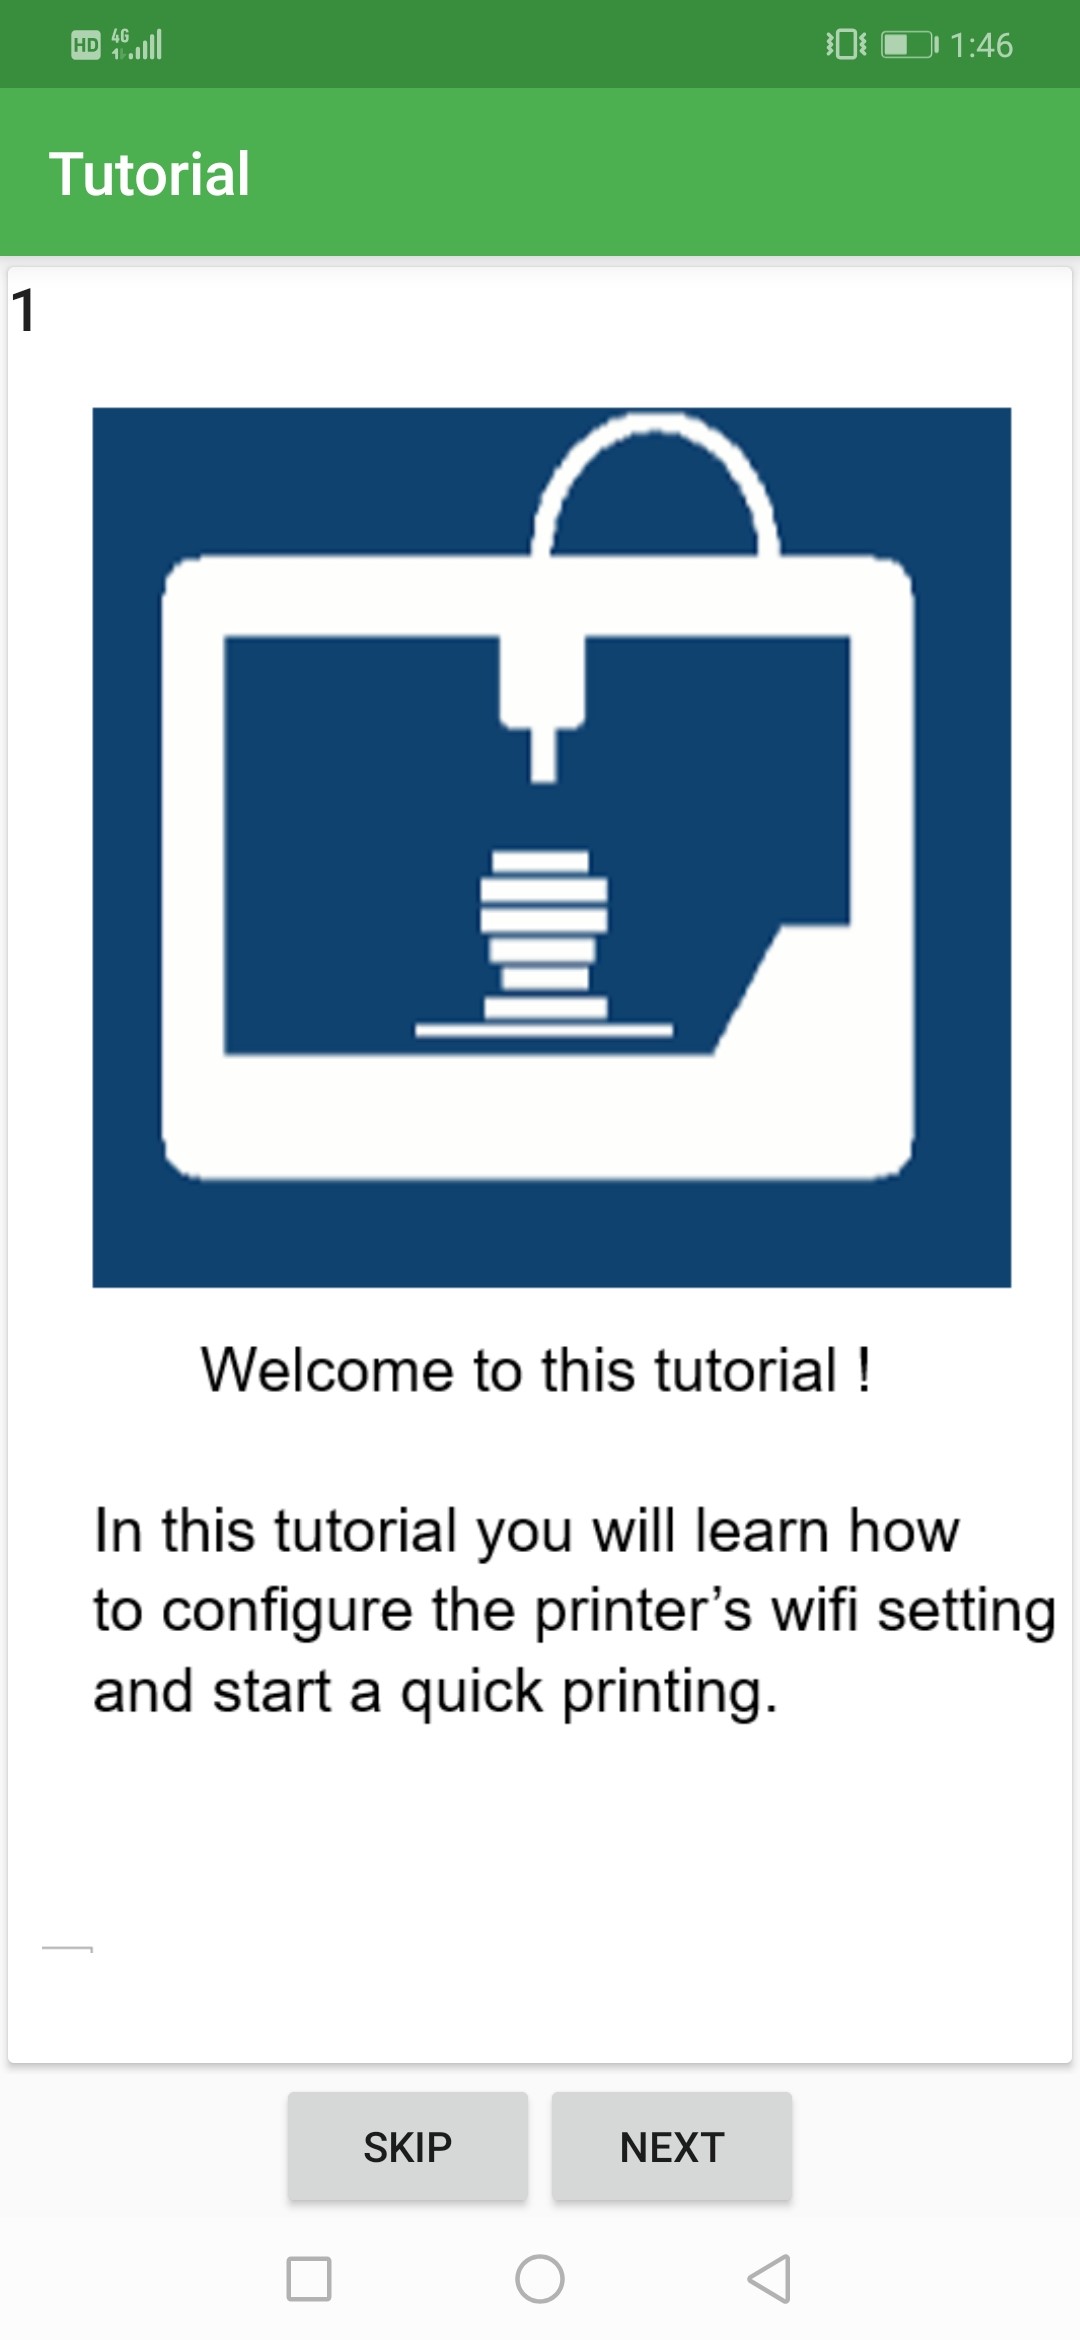
MP Cadet Help Guide
Congratulations on your purchase of the MP Cadet! We know you will have a great experience printing, but in case you run into any issues, here is a guide that provides some tips that can be quite helpful.
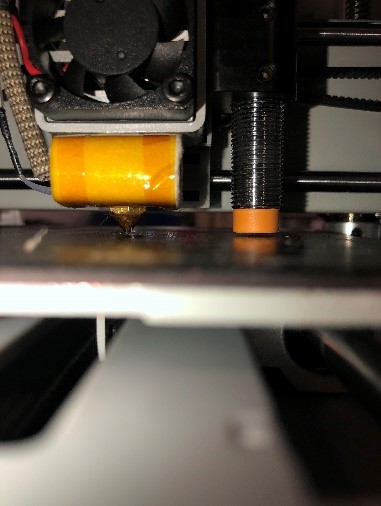
Loading Filament
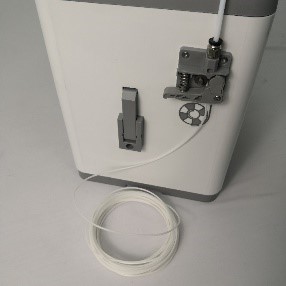
Once you have set up the printer and you are ready to load filament for the first time. It is perfectly normal if you run into a bit of trouble getting the filament easily into the hot end. No worries, try the following steps!
- On the Main Menu, use the knob to select the Prepare option, then press on the knob to enter the Prepare Menu.
- Use the knob to select the Auto Feed Filament option, the press on the knob to continue.
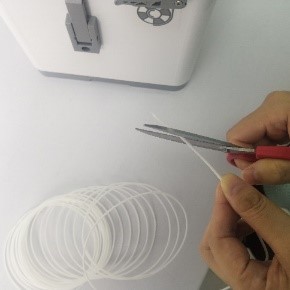
- Using a pair scissors or side cutters, preferably, cut the end of the filament at an angle, then carefully straighten the last 2-3 inches of the filament end. (This is important as this may be the reason why sometimes the filament does not make it exactly to the hotend.)
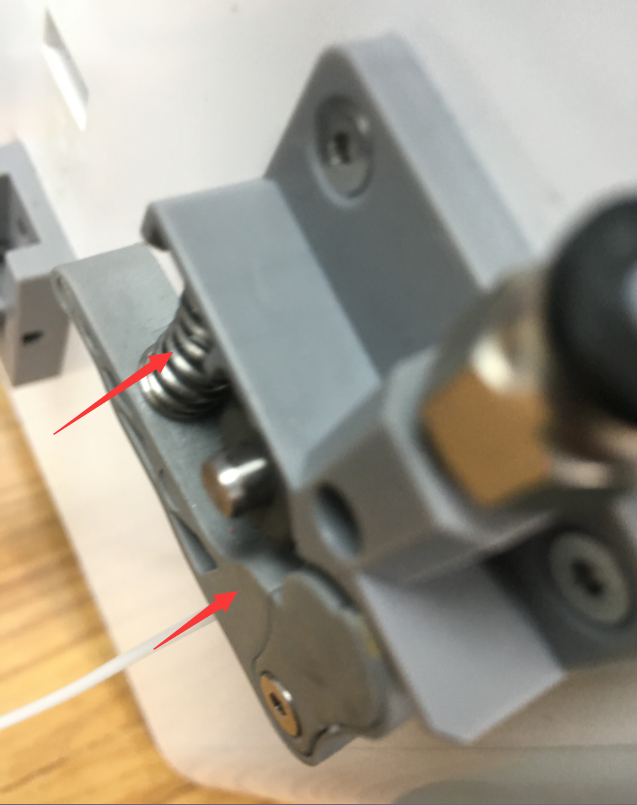
- Squeezing the lever on the Extruder, located on the left side of the printer, insert the filament into the hole at the bottom of the extruder. Continue to push the filament through, squeezing the lever, until you feel resistance, then release the lever.
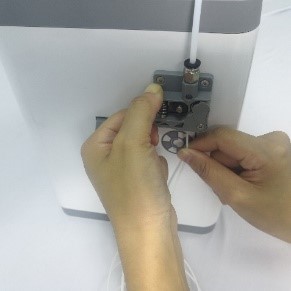
- Once the printer reaches the target temperature, the unit will beep letting you know it is ready to pull the filament for extrusion. Press on the knob to start loading the filament. Once the filament starts extruding out of the Nozzle, you may press the knob again to stop the extrusion. Then press the knob, once you select the Continue option. At this point, the printer is ready to print.
Possible Filament Issues
The following tips are useful if you encounter any issues when changing the filament.
Broken Filament in the Feeding Tube
A common issue is having the filament break as you are trying to remove it when switching it out for another. Whether it is by accident when not squeezing the extruder lever or a bad piece of brittle filament randomly breaking when you are pulling the filament out, there is a chance that the filament gets stuck somewhere within the tube that you cannot easily reach. If that happens, do the following:
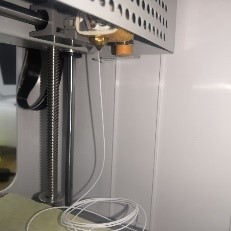
- Locate the two Bowden connectors with black locking tabs that hold the tube in place. Depending on which side would be easier to reach the filament from, press down on the black locking tab until you feel it pop in.
- While holding down that black locking tab, please pull the feeding tube out. After doing so, you should have better access to reach the filament.
- If needed, please do the same to the other end of the tube, where the second Bowden connector will be located. This will release the tube completely.
- In order to place the tube back into place, you must just press down on the black locking tabs, one at a time, to insert the tube back into the Bowden connectors.
- Check that all is good to go, by trying to load the new filament in.
- Once the filament is in and extruding, then the printer is ready to print.
Clogs
The second and most common issue that you will encounter is clogged filament inside of the nozzle. This happens when leftover filament residue builds up in the Nozzle area from low maintenance or it is possible that when the filament was being removed, a piece stayed inside the hotend. Need not to worry, the steps below will help you unclog the printer.
- After the clog has been identified, the best thing to do is to take out the filament that is still cool and part of the spool, completely out of the printer.
- Remove the tube at the lower Bowden connector by the nozzle. You may need to remove front grill for better access. (Disassembly steps shown at the end of this guide.)
- Preheat the printer to a good temperature between 225 degrees Celsius and 230 degrees Celsius that way whatever filament is obstructing will melt and loosen up.
- Cut out a piece of filament of about 6-8 inches flat across, not at an angle, and push the filament down through the lower Bowden connector by hand. This will allow you to have more leverage to use a bit of force and push the filament down to help extrude whatever was obstructing.
- Remove the piece of filament used and cut across that piece or a new one to try the steps once again, to make sure all of the clog is cleared.
- Once you are confident that the nozzle is cleared, put the feeding tube back in its place and try loading filament normally.
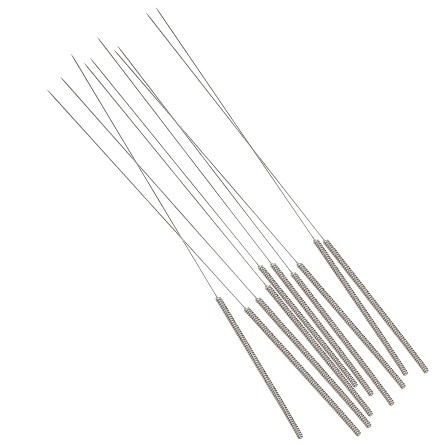
- If needed, you can additionally use a 3D printer nozzle cleaning needle to loosen the obstructing filament from the clog through by coming up the nozzle.
- If the filament is flowing out normal, then a print can now be started.
**Side note**
Another way to assist with a better filament feeding flow and avoid possible clogging, especially when using anything spool larger than a 0.5kg, is to have an external spool holder to keep the spool in place and help the filament feed at a good angle for constant flow.
Platform Sticker Replacement
On a regular printer, the bed, or platform, can become worn out after a while from usage. The Cadet offers a bit of a different type of bed that is removable and flexible, but also includes a Platform Sticker to not only protect the bed from so much usage, but also helps with print adhesion to the said bed. This can also wear out from usage, but the good thing is that this sticker can be replaced and the printer does come with an extra one. It is simple to replace as you will see in the next steps.
- Remove the magnetic bed from the metal print platform.
- Remove the sticker from the magnetic bed, just like removing a piece of tape.
- Check that there is no leftover adhesive residue on the magnetic bed. You may use a bit of 70% or higher IPA alcohol to clean off any excess residue.
- Once clean, place the new sticker on the correct side of the bed, identified by its black top. Be sure not to leave any air bubbles under as that will cause changed to the start of a print.
- Place the magnetic bed back onto the metal print platform.
- The printer is now ready for your next print project.
**Side note**
If a platform sticker is no longer available, please try using blue painters’ tape that is about 1 inch wide. The surface feel to it is about the same as the platform sticker. Blue painters’ tape is also well known for assisting with adhesion, in the 3D printer industry. This also helps when using glue stick for even better adhesion, which may be needed as this printer does not have a heated bed.
Wi-Fi Connectivity and PoloPrint App
The printer also has the great function of being able to connect to a wireless network and send information over to a print monitoring app called the PoloPrint-Monoprice app. With this app, you are able to monitor the print status, control certain aspects of the printer like start, pause, or stop a print. You can also print a cloud model that you can select from the file on the app or select one from your SD card, which is also an option seen in the app.
Aside from printing through the app, the wireless option also helps to print directly from the slicing software WiiBuilder. Both the computer and the printer must both be under the same wireless network.
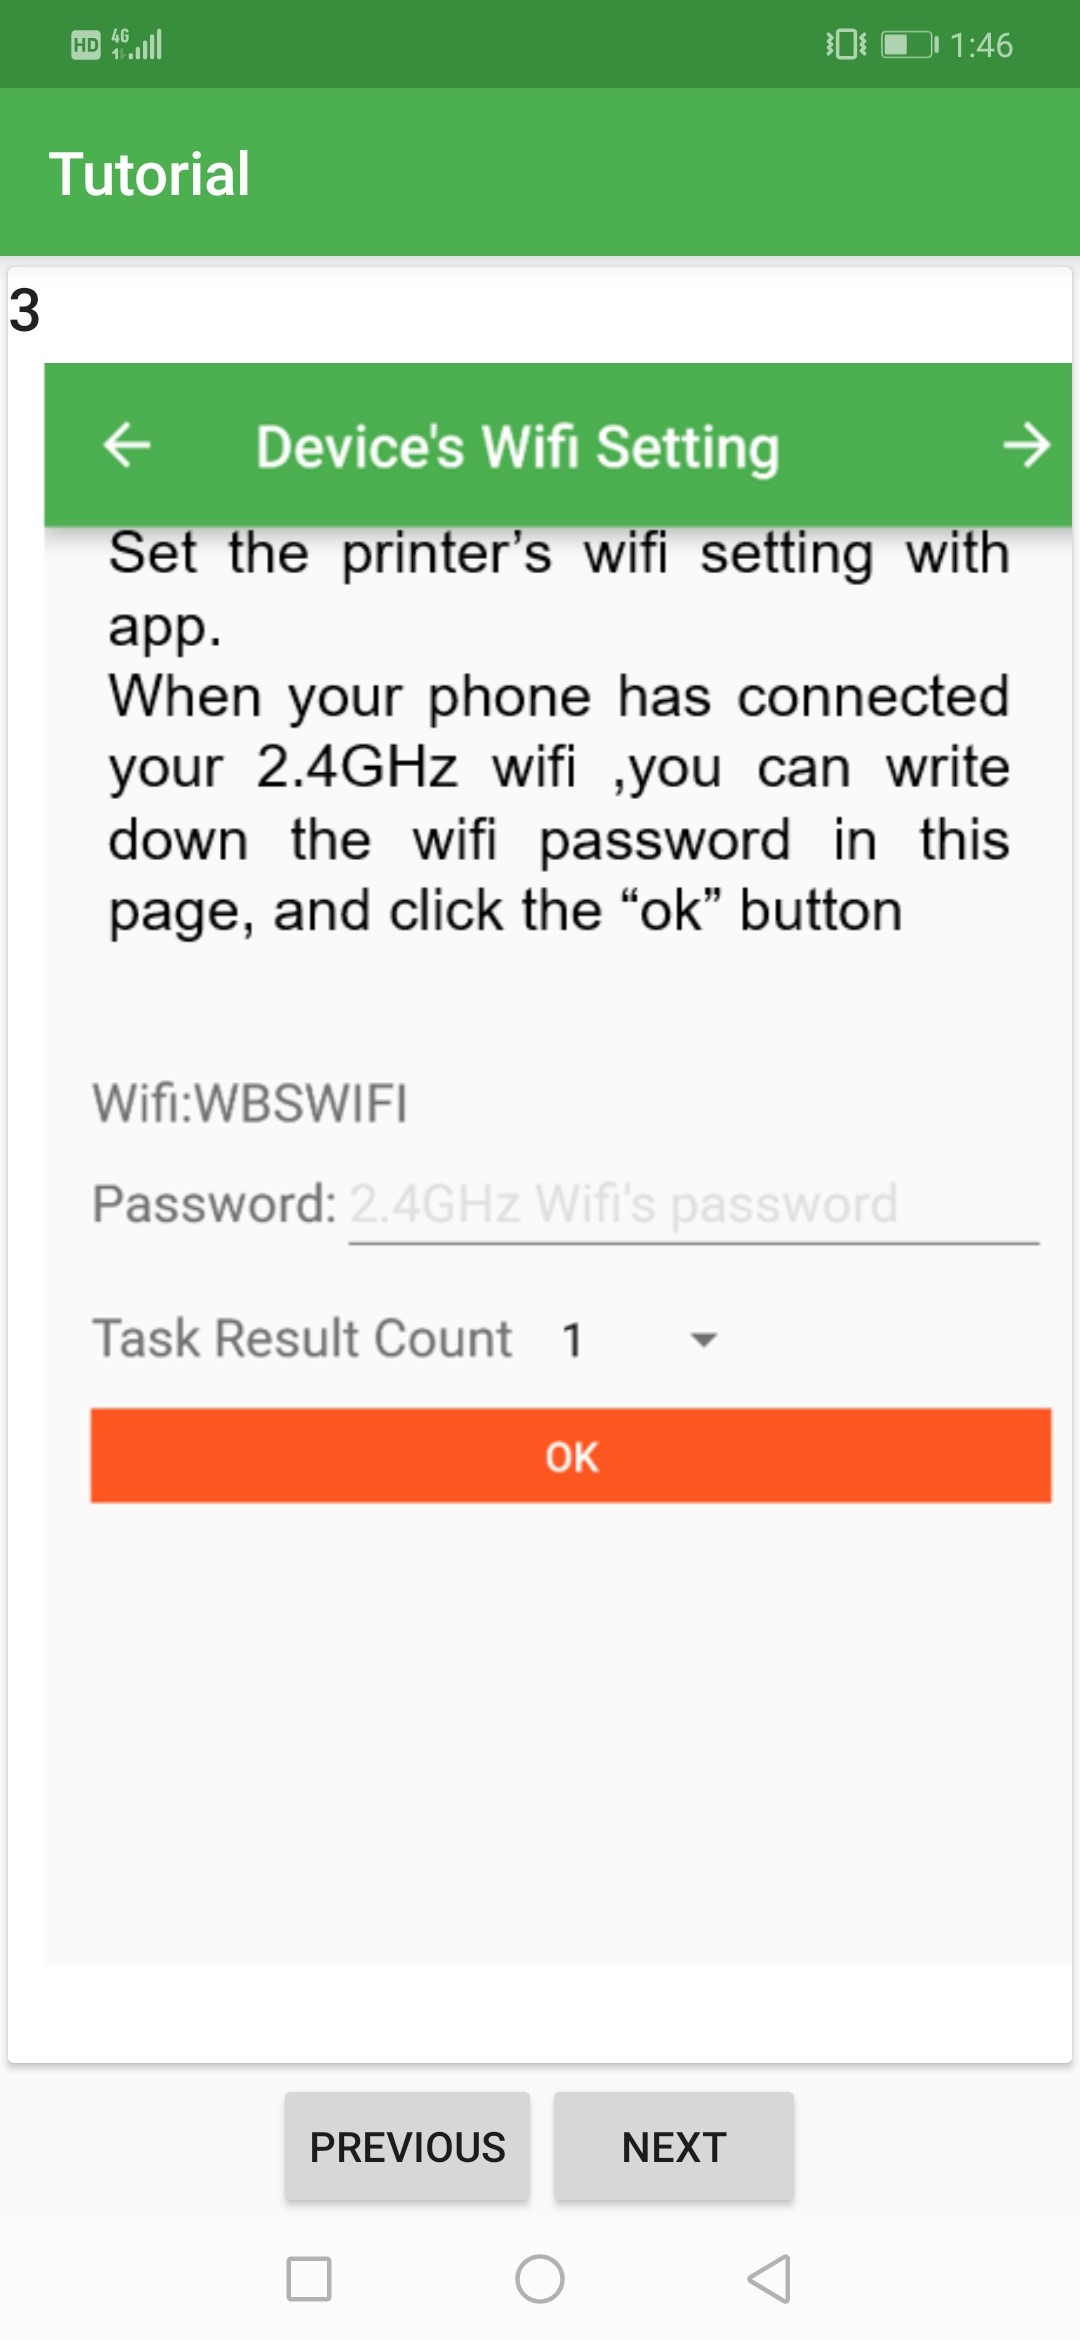
The following steps explain how to set up the Wi-Fi connection on the printer and the PoloPrint-Monoprice app. Note: that the MP Cadet printer does not support 5G Wi-Fi® networks and cannot connect if there are already 10 or more Wi-Fi connections.
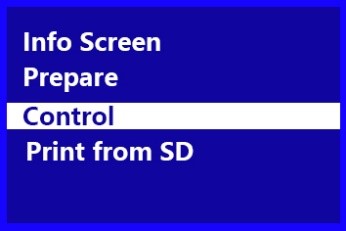
- On the Main Menu, use the know to select the Control option, then press the knob to enter the Control menu.
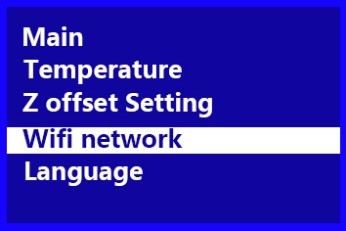
- Use the knob to select the Wi-Fi Network option, then press the knob to enter the Wi-Fi Network Menu.
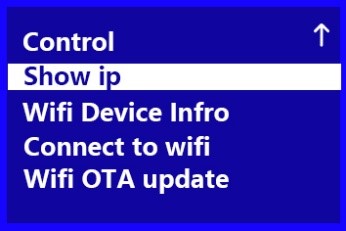
- Using the knob, select the Connect to Wi-Fi option and press the knob to display the Connect to Wi-Fi screen.
- Go to your Google Play or Apple App Store, download and install the PoloPrint-Monoprice app. During that installation, the app may ask for permission to access Storage and Location information. Select the option to allow access to those things as they are needed to relate information between the printer and the app.
- Select Done to continue.
- After the installation, open the PoloPrint-Monoprice app on your mobile device. The app should display a wizard interface and that will introduce you to its features. Select the Next option to go through the tutorial pages and select Finish on the last page.

- The
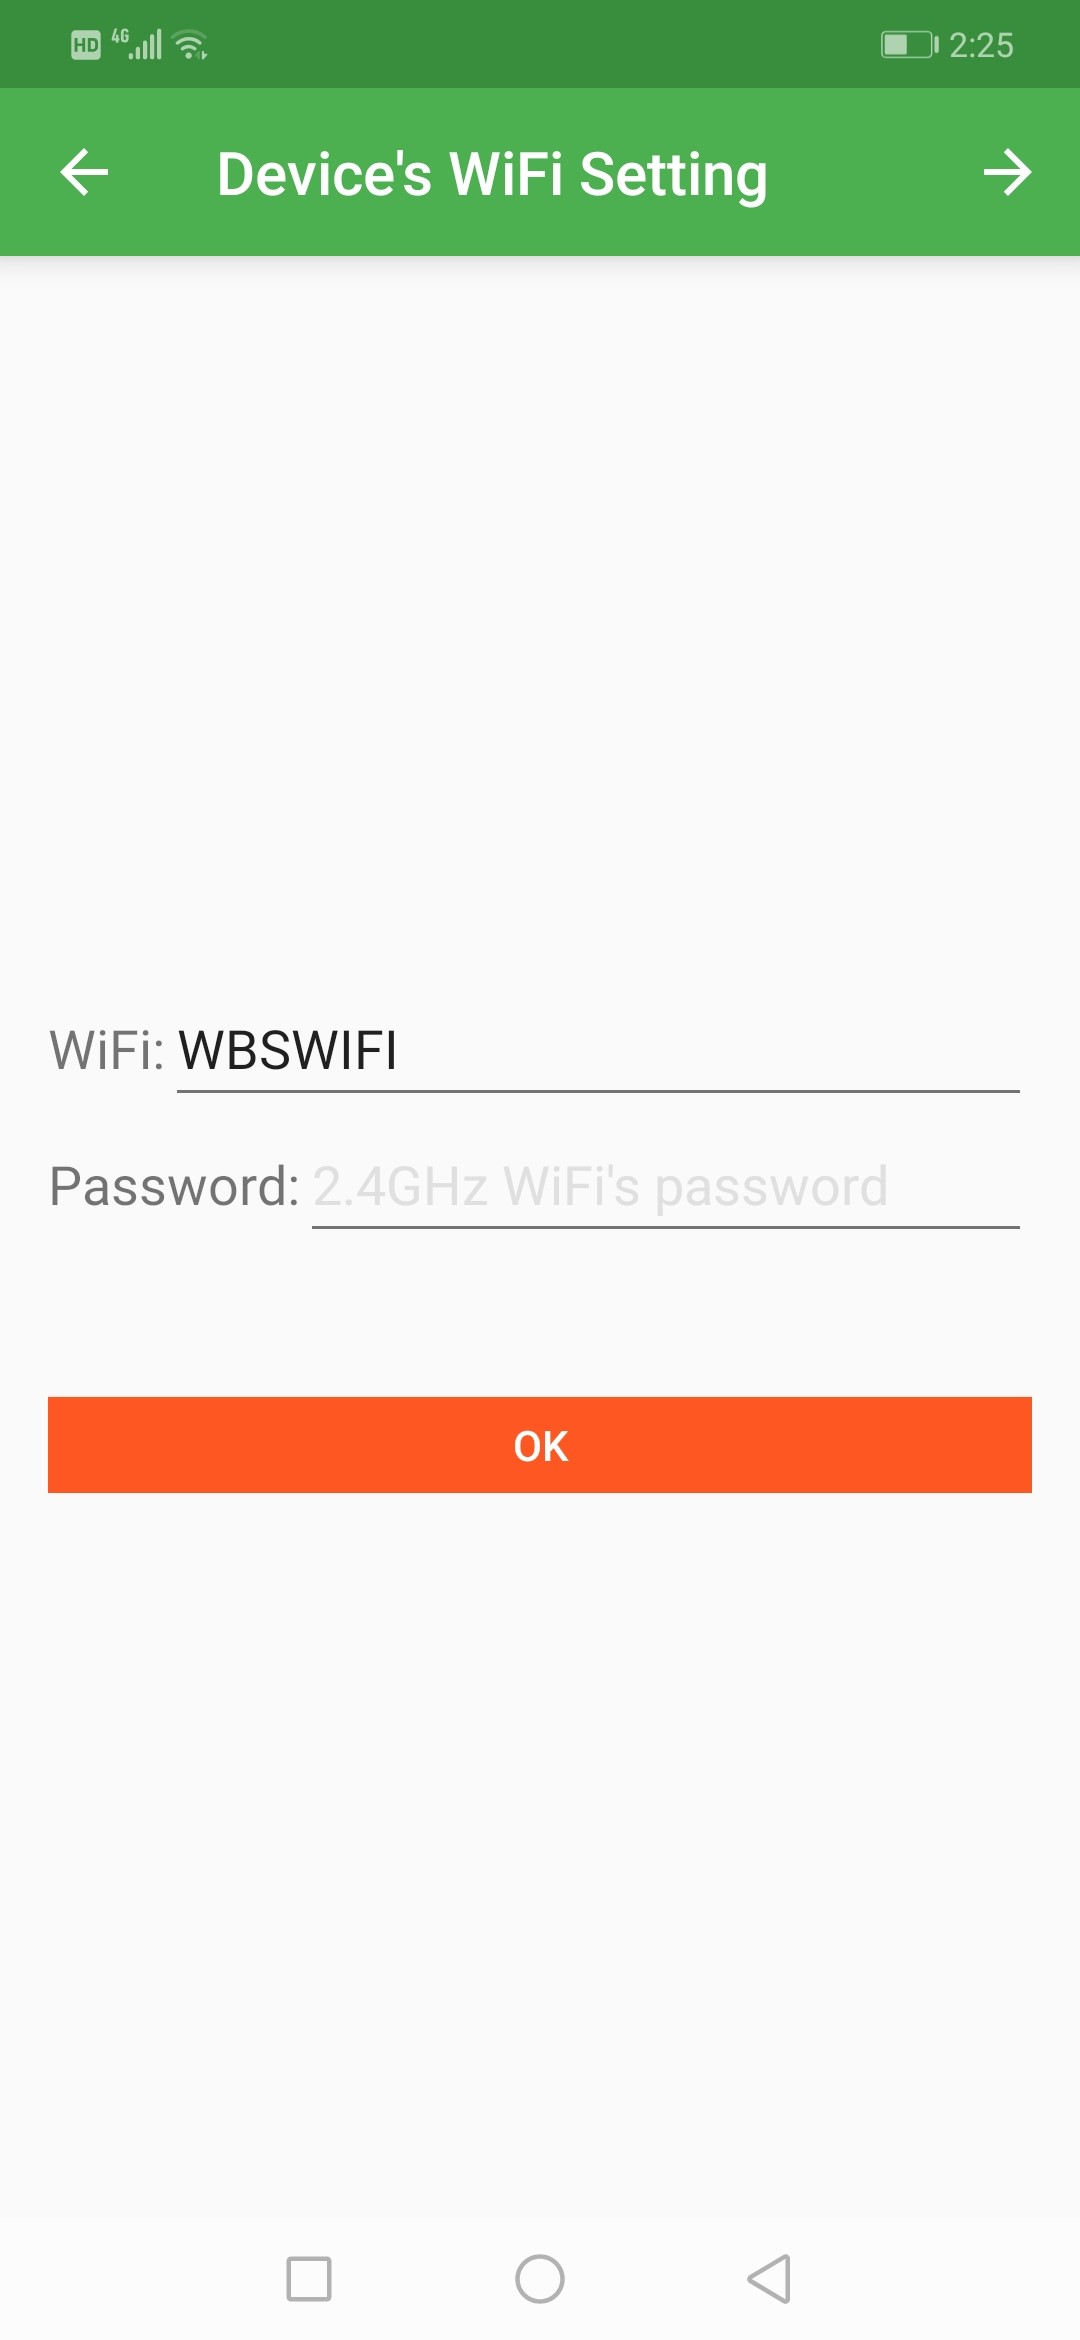
installation wizard will prompt you to input your Wi-Fi network settings. Input your network’s Wi-Fi SSID and Password, BUT do not continue yet. Note: For Dual Band router users, the 5G networks are not supported. It must be a 2.4 Ghz network.
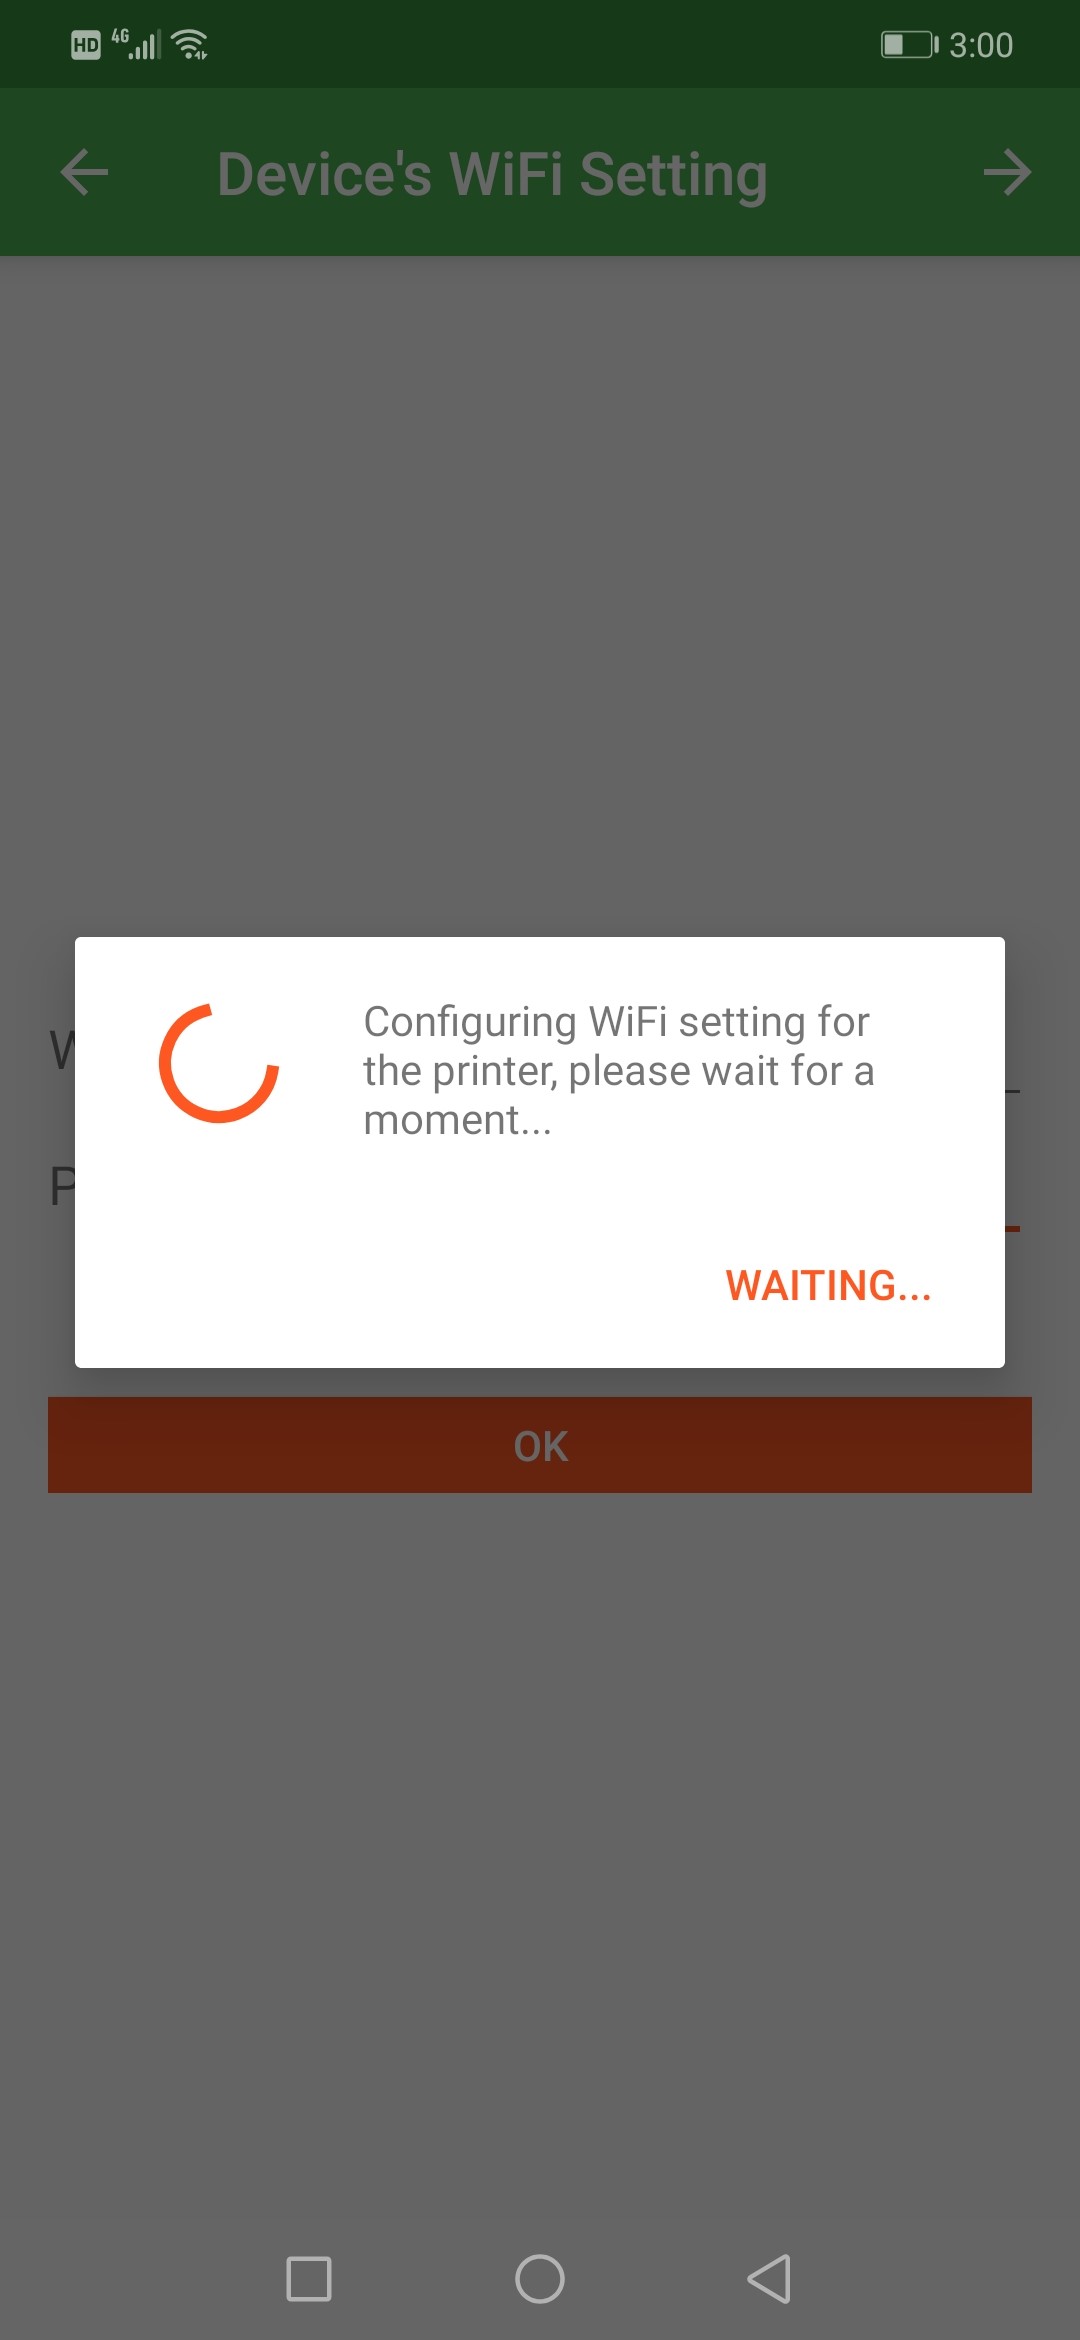
- Press down on the printer knob. The printer will attempt to connect to your Wi-Fi network.
- Once the connection has been successfully made, then proceed to continue and touch the OK option on the app.
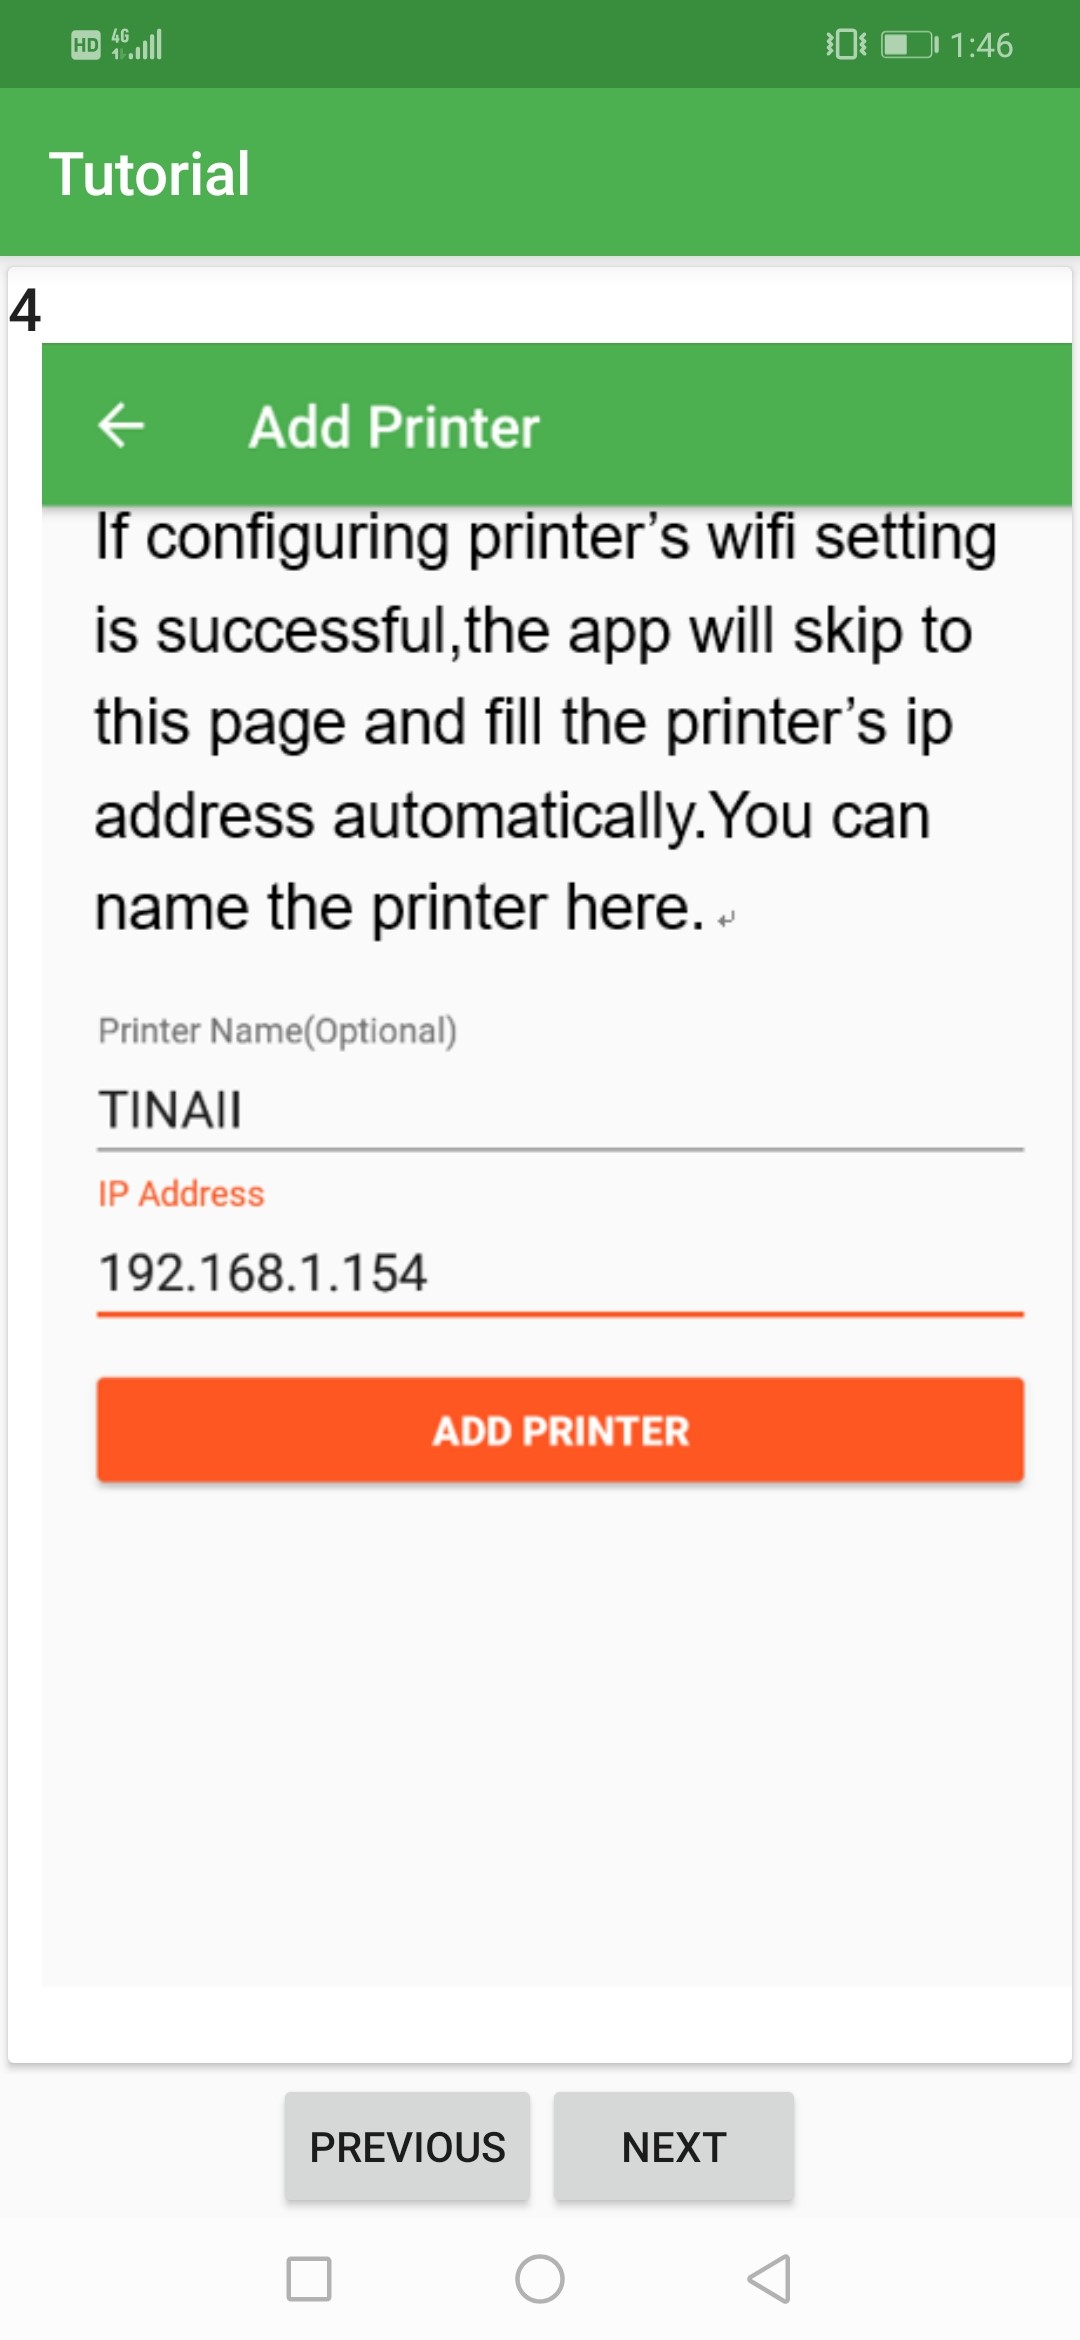
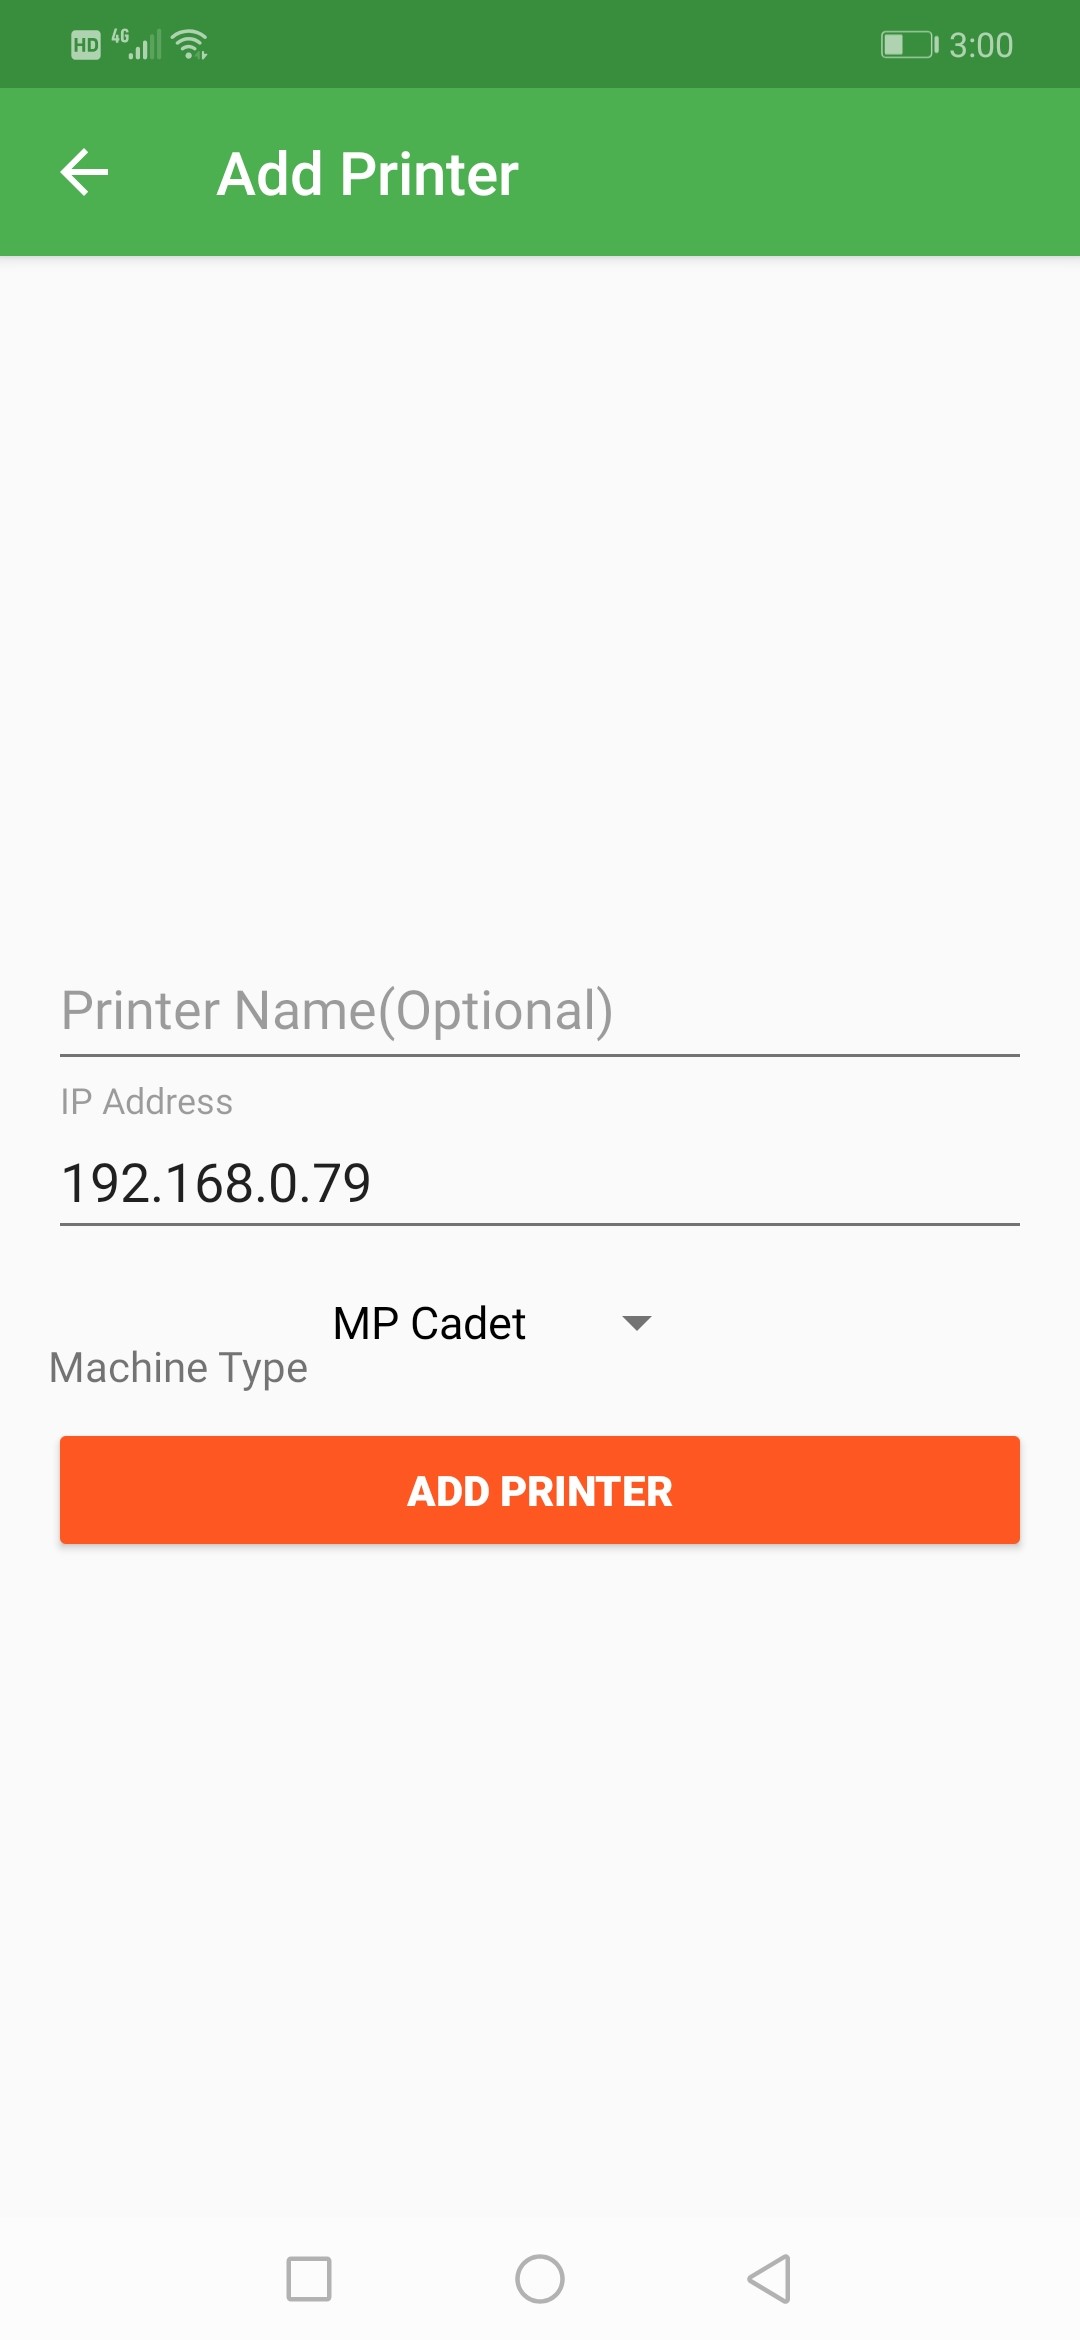
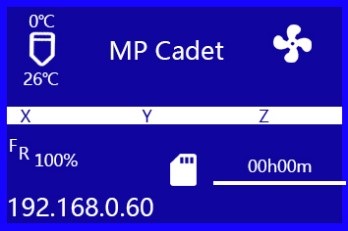
- After establishing the Wi-Fi connection, the wizard will ask you to input the printer’s name, which is optional, and the IP address. (Below is a way to find the printer’s IP address.)
- Use the Machine Type pull-down list box and select the MP Cadet. Select the Add Printer option to complete the process.
How to Show the Wi-Fi IP
- On the printer’s Main Menu, use the knob to select the Control option, then press the knob to enter the Control Menu.
- Using the knob, select the Wi-Fi Network option, then press the knob to enter the Wi-Fi Network Menu.
- Use the knob to select the Show IP option, then press the knob to continue and view the network IP address. (This is what will be used in the PoloPrint-Monoprice App)
**How to Disassemble the MP Cadet Printer
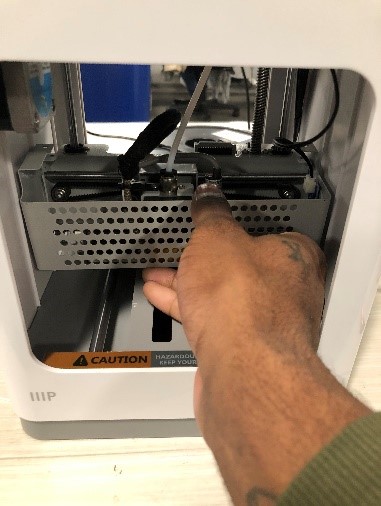
If you need to get better access to the Bowden connector, need a way to access the nozzle for a replacement in the future, or want to adjust the leveling sensor, you can use the following disassembling steps to get there.
- Place the printer on a sturdy surface and face it towards you.

- On each side of the front grill will be two phillip's head screws that need to be removed.
- Screw #1:
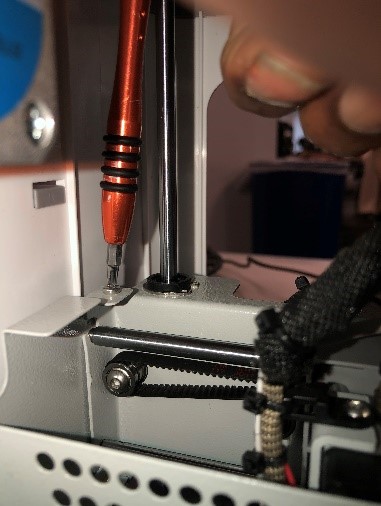
- Screw #2
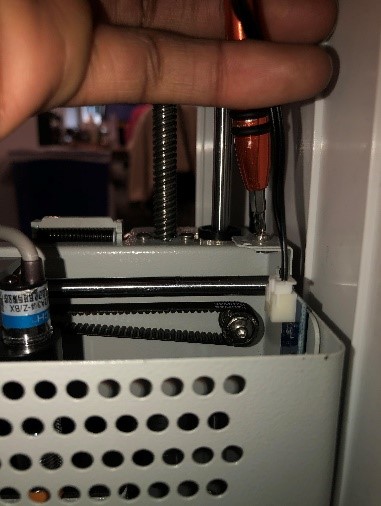
- The grill can now tilt forward to be removed from its hinges.
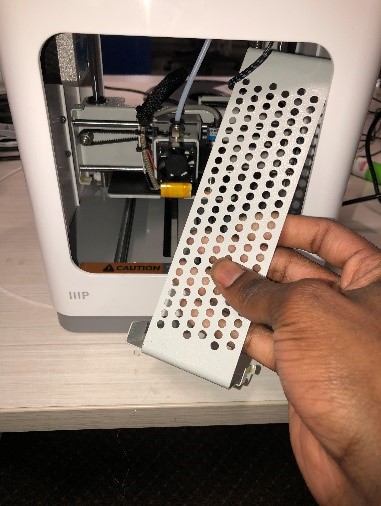
- Now you see the full assembly.
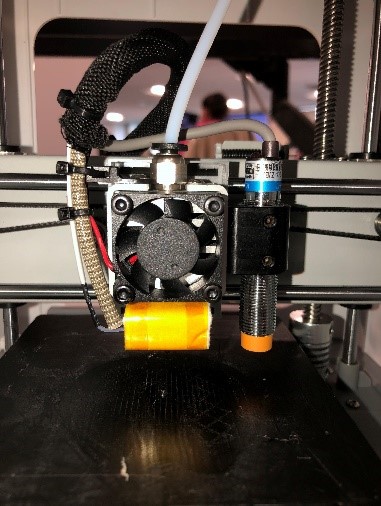
- The four fan screws hold the entire extruder assembly.
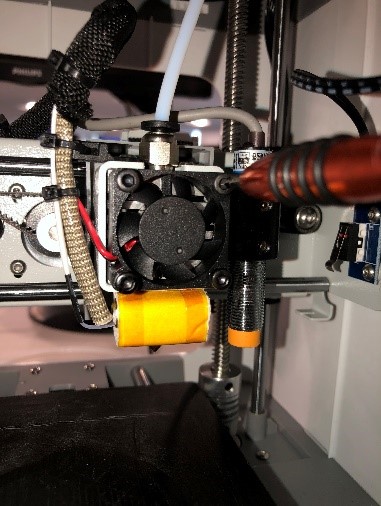
- Removed from housing. The screw on the bottom of the hot end is to remove the nozzle assembly.
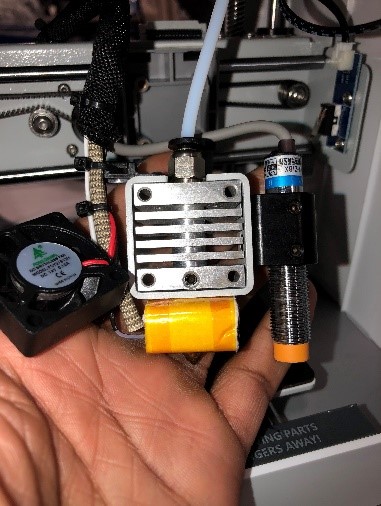
- Use these two screws to lock the inductive sensor in place. This may need to be adjusted if the nozzle is contacting the bed.
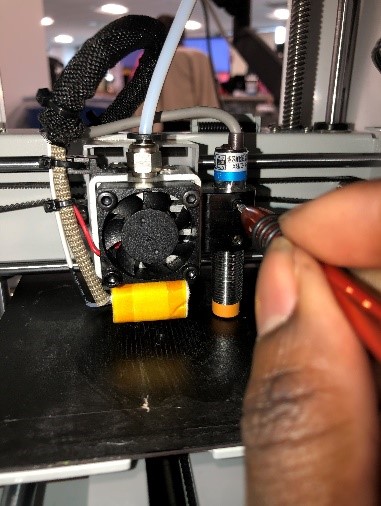
- The sensor should sit right above the bottom of the nozzle.
- To assemble the printer back together, please follow steps 1 – 6 in reverse order. The printer would then be ready to print.